This tutorial will show you how to setup and run your first X3DOM scene. All you need is a WebGL-capable browser and some text editor. As the whole X3DOM application will be part of a regular Web page, and also authored in a way similar to HTML, it might help if your editor also has some syntax highlighting for HTML or XML, or if it even is a full, Web-oriented IDE, like, for instance, WebStorm. If you have your preferred text editor and your browser at hand, and if you know how to access or open the Web page inside your browser (see the Getting Started guide for details), you are ready to start with this tutorial.
First, create a new text file and name it something like HelloX3DOM.html. Then, use your preferred editor to paste the following into the empty file:
    <html>
        <head>
            <title>My first X3DOM page</title>
            <script type='text/javascript' src='http://www.x3dom.org/download/x3dom.js'> </script>
            <link rel='stylesheet' type='text/css' href='http://www.x3dom.org/download/x3dom.css'></link>
        </head>
        <body>
            <h1>Hello, X3DOM!</h1>
            <p>
                This is my first html page with some 3d objects.
            </p>
        </body>
    </html>
If you open the file inside your browser, it will display as a regular HTML page with a text message.
However, as you might have noticed, we are already able to add some X3DOM content to our page now, because we have already included X3DOM as a JavaScript library, along with the X3DOM CSS file, which is necessary to have the X3DOM context and some X3DOM-related overlays nicely formatted. In the above HTML code, you can see that we have included the development version of X3DOM and the CSS file via the script and link tags.
Let's continue by adding some 3D content. First, we'll need an x3d element, which describes the X3DOM context in which the scene will be displayed.
Similar to an HTML element, like p or div, the x3d element defines a rectangular region inside the HTML page.
The whole 3D content of the X3DOM context is described as a scene, so we'll add a scene tag inside of the x3d tag. This is something that comes from the X3D standard, and it is not important in the context of this tutorial. A scene can contain many different nodes, like, for instance, lights, groups, viewpoints and objects. In this first example, we are simply defining a 3D object, which is done by using the shape node. Inside of the shape node, we will have to specify the geometry of the object, which we will do using a simple box node. You can now add the following code after the closing p tag, inside the body of your HTML page:
    <x3d width='600px' height='400px'>
        <scene>
        <shape>
    <box></box>
    </shape>
        </scene>
    </x3d>
If you now open the HTML page with your browser, the result should look like this:
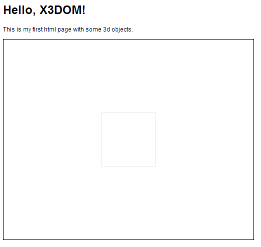
As you can see, there is now a new area filled with white color, which is X3DOM's 3D context. It has a width and height that match the corresponding attributes defined in the x3d tag.
However, the box we have added is not visible (or hardy visible - you might recognize a light gray border).
This is due to the fact that we haven't assigned any material to the box, so X3DOM has picked a default white material, according to the X3D standard.
Since the background of the page is also white, the box is not visible. To change the material color, we will first need to add an appearance
node as a child of the shape node we have created. Inside the appearance node, we can then define a material node, which has some attributes
that let you define a simple material, using a single color for the full surface of the shape. This can be done by setting the diffuseColor attribute
of the material node - we will now set it to red by specifying RGB values, each between 0 and 1, as '1 0 0':
    <shape>
        <appearance>
        <material diffuseColor='1 0 0'></material>
        </appearance>
        <box></box>
    </shape>
The resulting page inside your browser should now look like this:
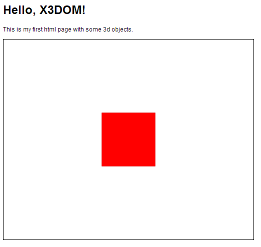
material now.Try to navigate around in the scene by pressing the mouse. You should be able to inspect the box from all sides by pressing and holding the left mouse button and moving the mouse around. In a similar way, you can zoom in and out, using the right mouse button.
We will now add two more objects to the scene, a blue sphere and a green cone. This is done in a very similar way as we already did it for the box. However, besides a sphere and a cone node, we will also need something to move the sphere and the cone to some other place in the scene. This is due to the fact that all 3D objects are, by default, placed in the 3D scene without any transformations applied, so our three objects would all show up as a big cluster in the center of X3DOM's coordinate system, which we don't want.
Like the coordinate system used in X3D and some other graphics-related standards (for instance, OpenGL), X3DOM's coordinate system has the y-Axis pointing upwards. The x-Axis is extending from the origin to the right (east), and the z-Axis is facing towards the viewer (south):
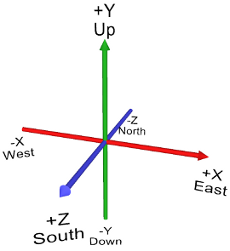
We will now simply transform the green cone three units to the left (west) before we add it, and we will move the blue sphere three units to the right (east), so that the content of the scene tag now looks like this:
    <shape>
        <appearance>
        <material diffuseColor='1 0 0'></material>
        </appearance>
        <box></box>
    </shape>
    <transform translation='-3 0 0'>
    <shape>
        <appearance>
        <material diffuseColor='0 1 0'></material>
        </appearance>
        <cone></cone>
    </shape>
    </transform>
    <transform translation='3 0 0'>
    <shape>
        <appearance>
        <material diffuseColor='0 0 1'></material>
        </appearance>
        <sphere></sphere>
    </shape>
    </transform>
Inside your browser, you should now hopefully be able to see the following result:
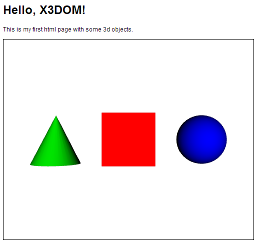
cone and sphere nodes.If you see a similar result - congratulations! You have just created your first X3DOM scene, using already a bunch of different X3D nodes. You might now be interested in continuing with the next tutorial, or you might want to browse the documentation of the X3DOM nodes that were just introduced.
 Display example HTML file
 Download full example (.zip archive)